Word Documents
This article provides helpful tips and tricks for working with Microsoft Word documents, from creating documents to editing and formatting.

Written by James Huang
Updated at October 8th, 2023
Table of Contents
You can create, view and edit Word documents on Supernote. In this article, you'll learn how to make the best use of Word documents.
Create a Word document
- Tap Files in the sidebar menu.
- Select a folder where you want to create a Word document.
- In the top right corner of the screen, tap
 .
.
Handwriting mode
- Enter handwriting mode
- Open a Word document.
-
Tap
 to enter handwriting mode.
- Handwriting recognition
- Rest your hand on the screen and start writing content freely.
- Tap
 to convert handwriting to typed text.
Keyboard mode
- Enter or exit keyboard mode
- Open a Word document.
- If you are currently in handwriting mode, tap to exit out of it and tap
 to enter keyboard mode.
 - Tap again to exit keyboard mode.
- Handwriting input on the keyboard
- Go to Settings > Display & Input > Keyboard.
- Tap anywhere on the Handwriting line.
- Tap the circle to the far right of the handwriting recognition languange you want to use.
- Add new language keyboards
- Go to Settings > Display & Input > Keyboard.
- Tap anywhere on the Add Keyboard line.
-
Tap
 to the far right of the language you want to add as a new language keyboard.
- Navigate pages in keyboard mode
- Tap the left/right arrow in the page number area to go to the previous/next page.
- Or you can tap on a page in the thumbnail pane (which you can bring up by long pressing the page number area in the top right corner) to quickly jump to it.
- You can also swipe up/down on the screen with one finger to go to the next/previous page.
Add a new page
- Tap to enter keyboard mode.
- Press the Enter key on the keyboard until the cursor is at the end of a page.
- Keep pressing the Enter key to add a new page.
Pinch to zoom
- Place two fingers on the screen.
- Move them apart to zoom in.
- Move them together to zoom out.
Reflow view
The reflow view allows you to rearrange text layout with one tap.
When content on the screen is zoomed in to the degree where some of it becomes hidden, the reflow view can come in handy, saving you from scrolling in more than one direction.
To enable the reflow view, simply tap ![]() on the toolbar.
on the toolbar.
Edit text using the keyboard
- Open a Word document.
- If you are currently in handwriting mode, tap to exit out of it and tap to enter keyboard mode.
- Place the cursor where you want to edit text.
- Use the keyboard to revise, add and delete text in the document.
- Tap
 on the toolbar to save the changes.
Edit text using proofreaders' marks
| Proofreaders' Marks | |
| Mark | WHAT IT MEANS |
 |
Delete |
 |
Break line (drawn from top to bottom) |
| Transpose | |
 |
Insert content |
 |
Cancel insert |
 |
Insert a space |
- Delete
-
Tap to enter handwriting mode.
- Draw a horizontal line across the letter, word, sentence or space you want to delete.
- Break line
-
Tap to enter handwriting mode.
- Draw a vertical line from top to bottom in the area where you want to break the line.
- Transpose
-
Tap to enter handwriting mode.
- Draw
 to transpose two letters, words or phrases.
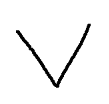
- Insert content using a V-shaped mark
-
Tap to enter handwriting mode.
- Draw a V-shaped mark
 between two letters, words or phrases to insert content, such as letters, punctuation marks.
 - Handwrite content you want to insert.
- Tap to have it converted to text and inserted.
Note: To cancel the insert action, draw a horizontal line across the V-shaped mark ![]() .
.
- Insert content by handwriting
-
Tap to enter handwriting mode.
- In the empty space at the end of a sentence, simply handwrite content you want to insert without the need to draw the V-shaped mark.
- Alternatively, you can start a new line in the blank space and handwrite what you want to insert.
- Tap have it converted to text and inserted.
- Insert spaces using an inverted triangle mark
-
Tap to enter handwriting mode.
- Draw an inverted triangle mark between two letters or words.
- Insert spaces using a V-shaped mark
-
Tap to enter handwriting mode.
- Draw a V-shaped mark between two letters or words.
- Tap without writing anything to insert a space.