Supernote Mail
Learn how to use Supernote Mail to better organize and manage your emails.

Written by James Huang
Updated at November 7th, 2023
Table of Contents
The Supernote Mail app allows you to read and write emails from your existing email accounts. It supports up to 3 IMAP email accounts from various email service providers, such as Gmail, Microsoft Exchange and Outlook/Hotmail.
How to sign in to your email account?
The sign-in steps may vary depending on the type of email you use.
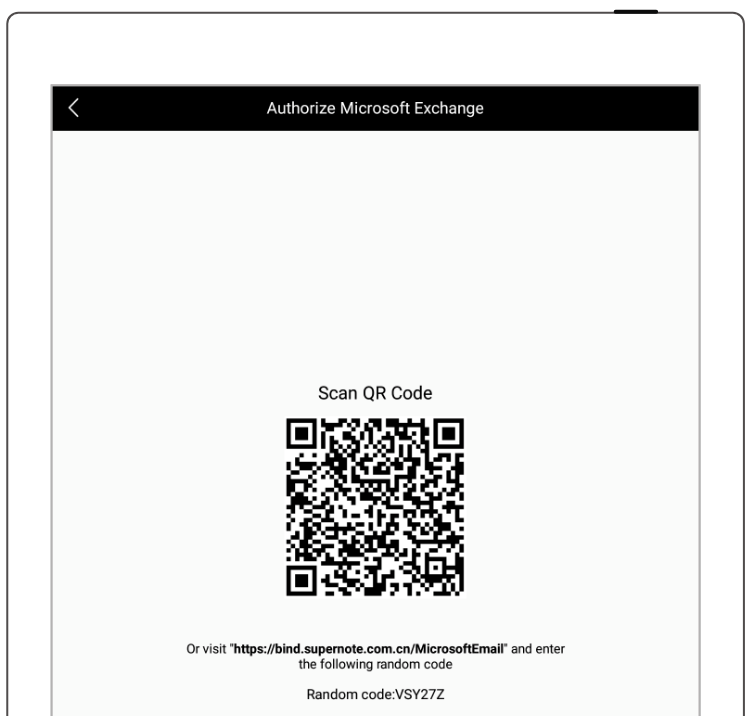
If you use a Microsoft Exchange account, follow the steps below:
- Tap Mail in the sidebar menu.
- Tap Microsoft Exchange to enter the authorization page.
- Scan the QR code or enter in your browser the URL displayed on the page.
- Enter the random code.
- Tap Authorize.
Authorization is also required for Gmail accounts and all you need to do is follow the same steps above to sign in.
If you use an Outlook/Hotmail account or other IMAP email accounts other than the abovementioned two options, follow these steps instead :
- Tap Mail in the sidebar menu.
- Tap Outlook/Hotmail or Other (IMAP).
- Enter your email address and password.
- Tap Log in.
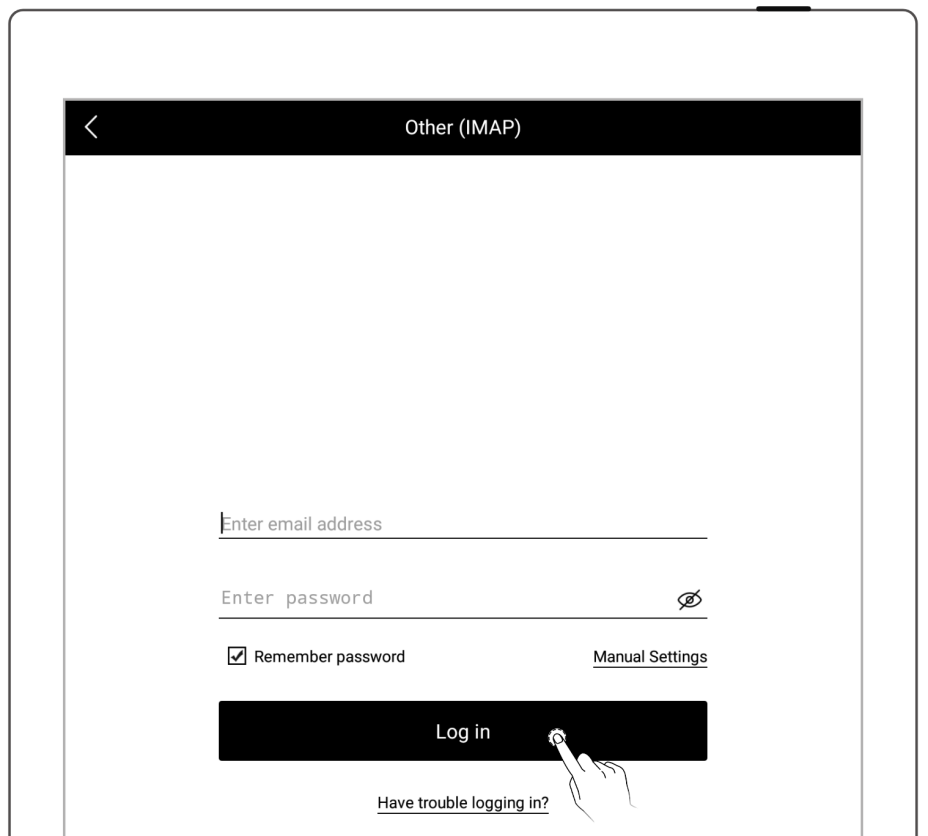
Note: if you are not able to log in to your email account, please check your email server settings.
Set up your email server
This step is not 100% required depending on the type of email you use.
- Tap Manual Settings.
- Enter the information required to configure your email server settings. (For your reference, most use port number 993 for IMAP and 587 for SMTP.)
- Tap Log in .
Note: If the need arises, you can tap Have trouble logging in for more detailed instructions on how to log in successfully.
Add account
Once you are logged in to one of your email accounts, you have the option to add two more accounts.
- Tap Add Account.
- On the Add Account page, select an email account to log in to.
Configure email settings
To manage emails more effectively, we recommend you to configure email settings after logging in.
Tap “Settings” in the left pane to start configuring the current email account you are logged in to.
- Limit the number of emails in a single folder to: up to 99 emails can be stored in any given folder.
- Server: this option allows you to configure your email server settings as needed to receive and send emails.
- Customized signature: you can create your own electronic signature using handwriting input or keyboard input.
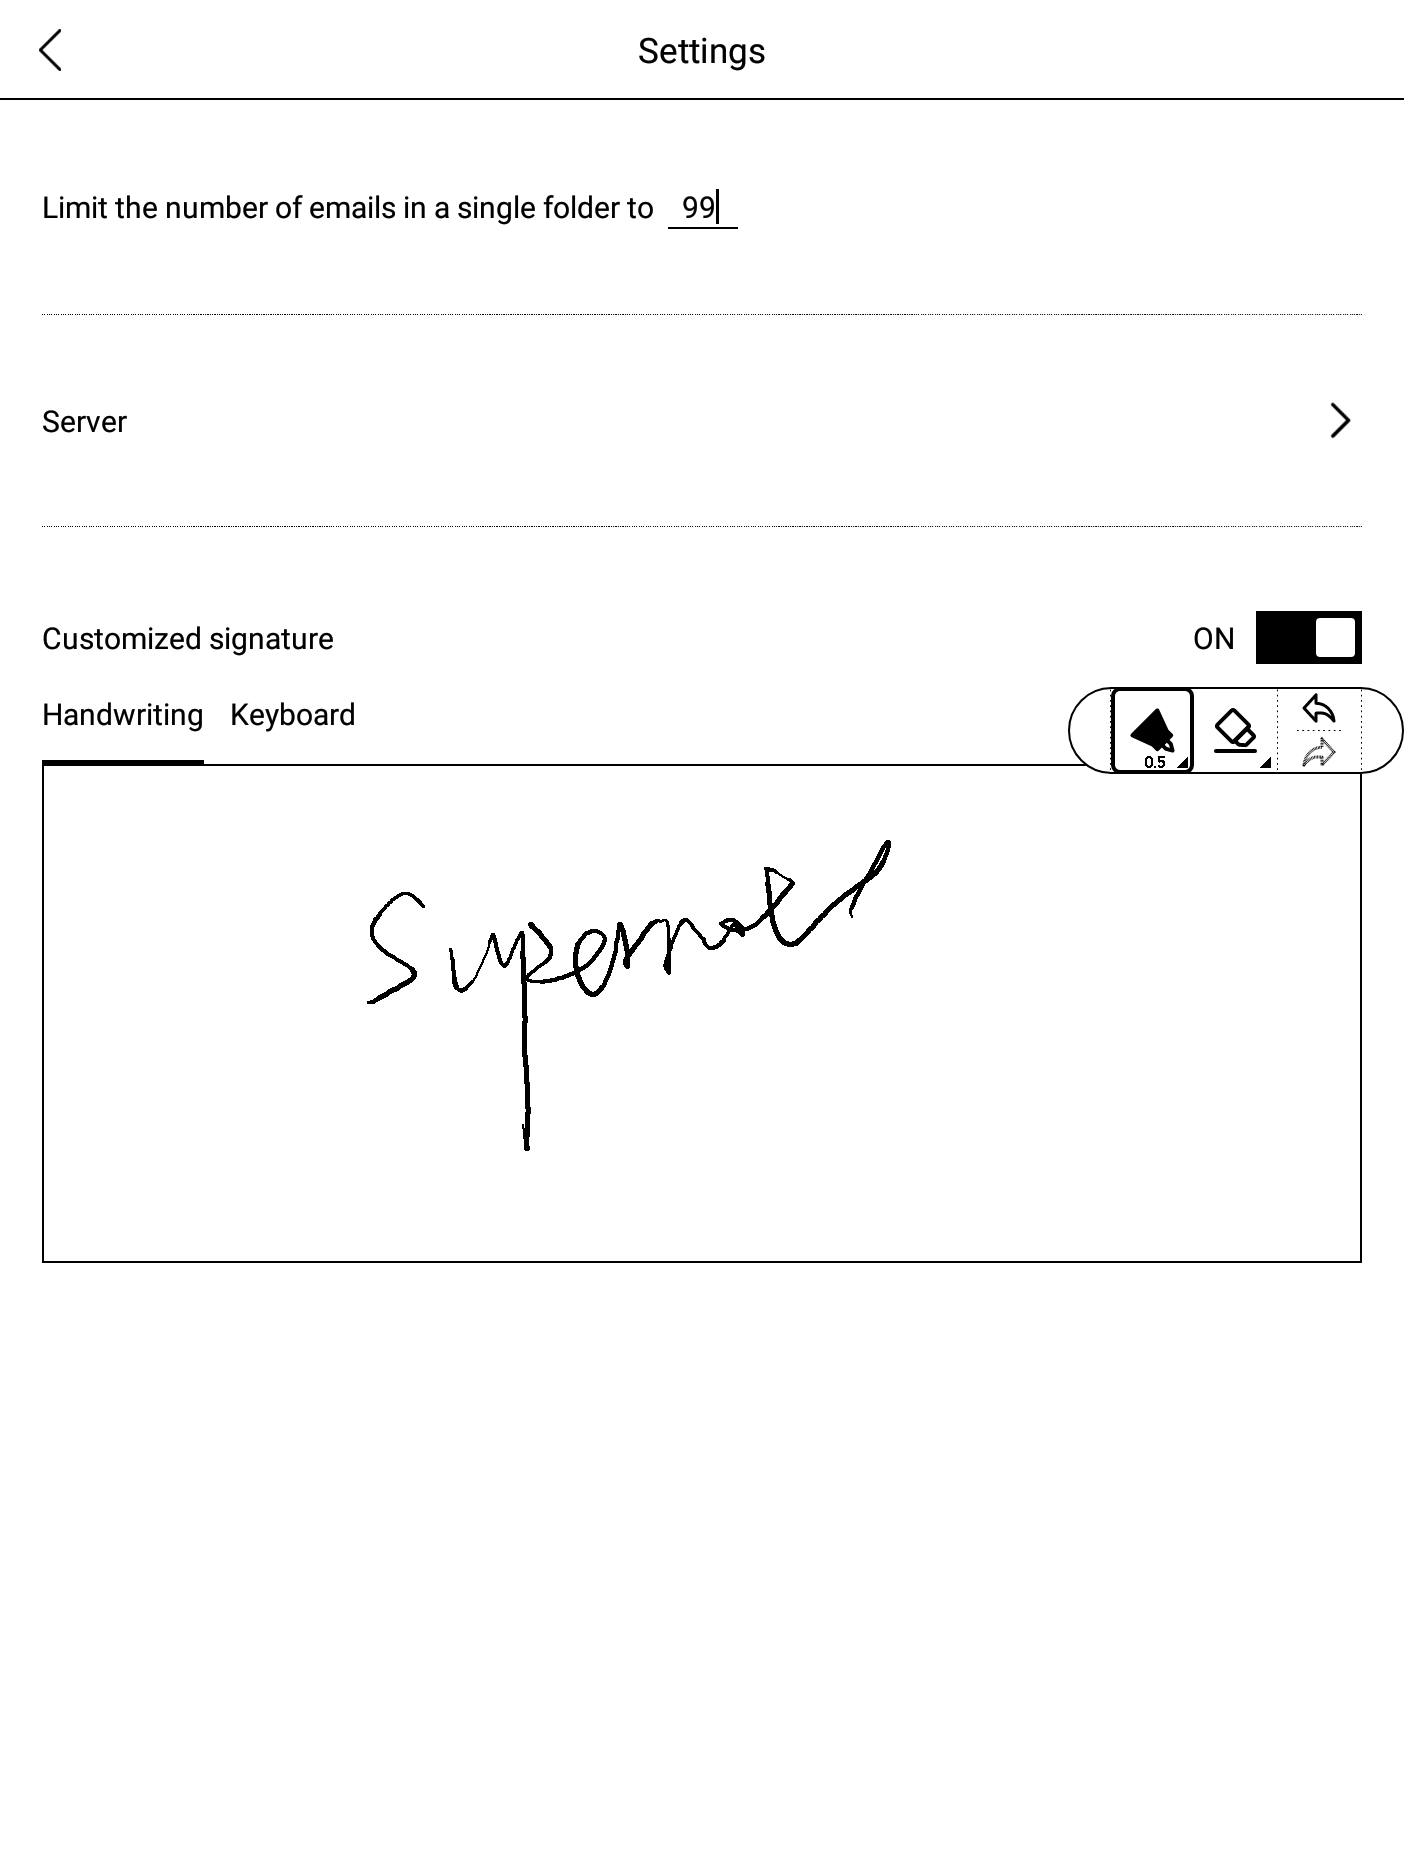
Note: Email settings are account specific.
Create and send email
- Tap “Compose” in the left pane.
- In the “To” field, add recipients. You can also add recipients in the “Cc” field.
- Add a subject.
- Write your message: you can choose handwriting input or keyboard input.
- Select a template from the three available templates. (Optional)
- Tap “+” to the far right of the clip icon to attach a file if needed.
- In the top right corner of the screen, tap the send icon.
Note: The mailbox has an attachment size limit of 20 MB. This limit applies whether you are adding one large attachment that's greater than 20 MB or multiple attachments whose total size is greater than 20 MB.
View emails in the Inbox
- Tap Inbox in the left pane.
- In the top right corner of the page, tap
 to sync incoming emails.
 - Tap the email in the Inbox list you want to view.
- Swipe up and down the screen with one finger to read through the email message (if it's longer than the screen).
- Pinch two fingers outward or inward to zoom in or out of the text in the email message.
- Tap
 to the far right of the clip icon to check for attachments.
 - Tap Save if the email comes with any attachment.
Note: By default, the attachments you download will be saved to the corresponding subfolders, which are named after the email addresses, under the INBOX folder in Files.
Delete or mark emails as read/unread
- Tap Inbox in the left pane.
- Navigate to the email you want to delete and long press it.
- Tap Delete or Mark as Read in the top function bar. If you accidentally mark a message as read, you can long-press it again to bring up the top menu bar, then tap Mark as Unread.
To delete or mark multiple emails as read/unread, check the boxes to the left of the corresponding emails.